
Bing Places for Business is a Bing portal that enables local business owners add a listing for their business on Bing. Using Bing Places for Business, local business owners can verify their existing listing on Bing, edit or update the listing information, add photos, videos, services and other information that shows their business in the best possible way.
Now this may be hard to believe, but there are other search engines besides Google. I’ll let that sink in for a bit; it’s pretty groundbreaking for many people. So many people are so familiar with Google. “To Google” something is even listed as a verb in the Cambridge Dictionary. So when thinking of search engine optimization lots of people still consider it to be search engine Google optimization. With that in mind, if you haven’t already got yourself on Google My Business (Google equivalent of Bing Places) you should probably ensure that getting listed on Google My Business is your priority.
What many people do not know, is that as of August of 2017, Bing accounted for 9% of market share worldwide, and 33% in the US. More than you’d expect? It actually makes sense, considering the vast majority of new computer sales are for Windows devices, which come preloaded with Bing-defaulting browsers (Internet Explorer or Edge). As you can imagine, there’s enough workplace users, old people, folks who don’t give a damn and others like them that make up a big share of the market.
It’s no Google, but if you’re looking to grab every single percentage of traffic you can (and why wouldn’t you?) let’s press on and get you set-up on Bing too, to really maximize your website’s organic search traffic.
How to get listed on Bing
- Sign up via bingplaces.com
- You’ll need to complete all your listing details (should both take no more than an hour)
- Last step is applying for verification (Bing says this takes 7-10 days)
- You receive a card in the post with a verification number
- You verify your Bing Places listing
- Your business is now listed on Bing Places!
Step 0: Check to make sure you aren’t already listed
Before you start, as with the Google My Business guide make sure your business isn’t already on there. It’s important to start here, or you risk having two business listings on Bing Places and confusing not just your customers but also the search engines and therefore damaging your rankings. Start with a search on Bing Maps and see if you can find yourself on there. If it is, scroll right down to the bottom of the listing and, in small font, you’ll see a link saying “Is this your business?”
Click on that link and it will, in effect, take you to the beginning on Step 1 below.
Step 1: List your business on Bing Places
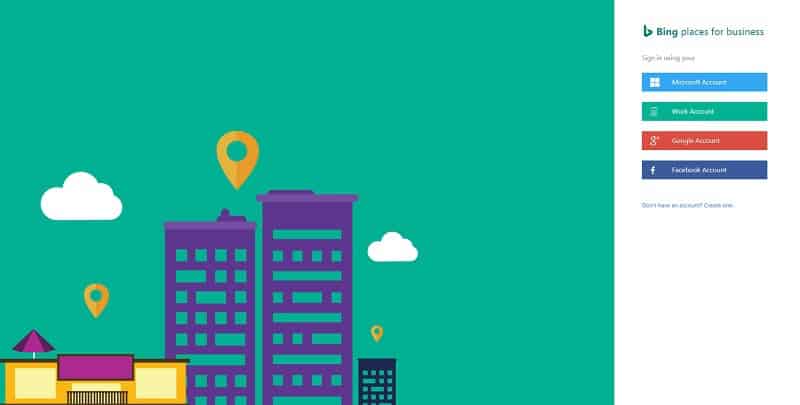
Head on over to bingplaces.com and you’ll see a screen like this:
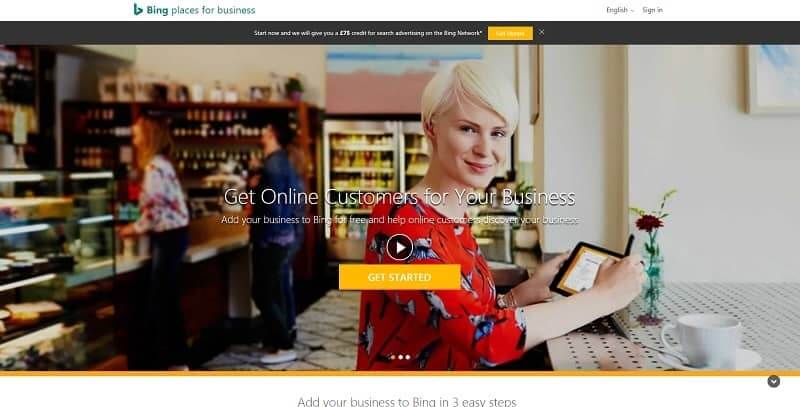
Click on the “Get started” button.
Step 2: Locate your business on Bing Maps
First up you’ll see a map, like this:
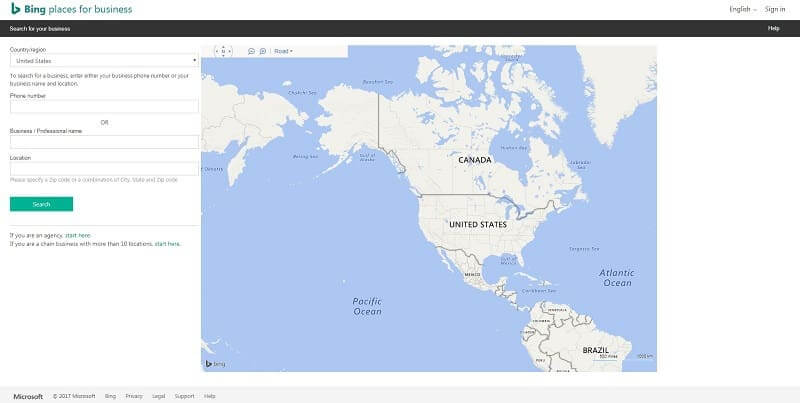
Bing will try and take the pain out of this process by asking for key information up front to find you more easily. These are: Country/Region and Phone number or your business name and location (a city, state or postal code).
If your business is found using these fields I strongly suggest you head back to Step 0 and make doubly sure you’re not already listed.
Note here that if you’re an agency, listing a business on behalf of a client or if you’re a business with multiple locations (10 or more) there are (easily missed) links at the foot of the sidebar which link you to options to help expedite this process using the Bing Places API.
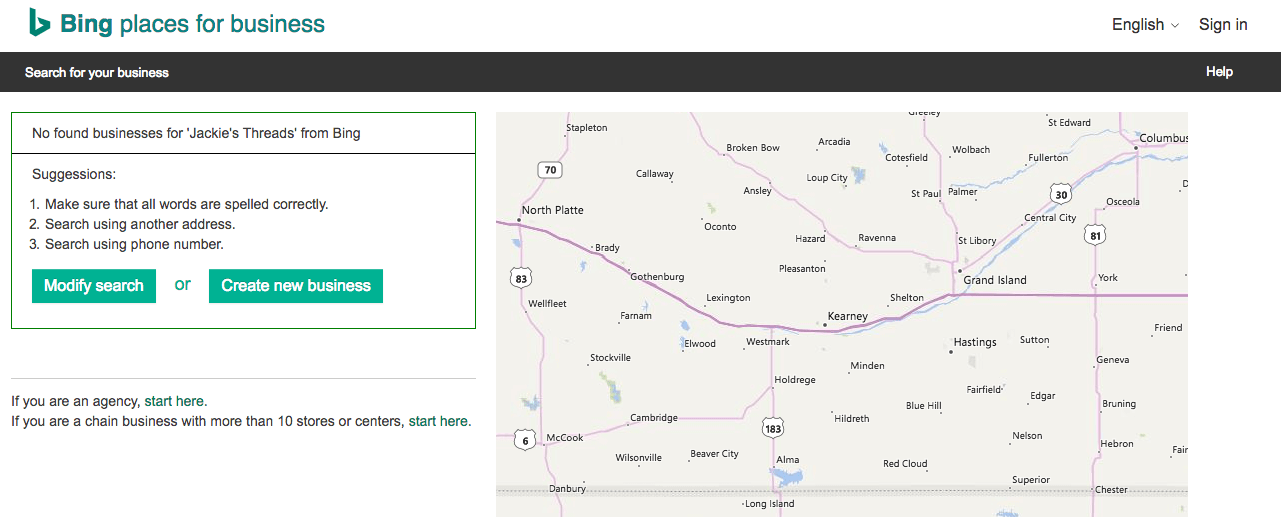
Step 3: Specify your location or add your business
You’ll get another chance here to “Claim business” if you find yourself here already. If not, click on “Create new business”.
Step 4: Sign Up
At this point you’re going to need an account to make a new Bing Places business listing. You’ll you want to pick the account you use here carefully. Too many businesses have listings on Bing Places and Google My Business that they can no longer access, edit or amend. They usually don’t even notice until they want to update it – say, extend their business hours – and then it can be an incredibly frustrating experience.
Pick an account that all the relevant people can have access to – notably the business owner. If this means you have to create a new account, do that.
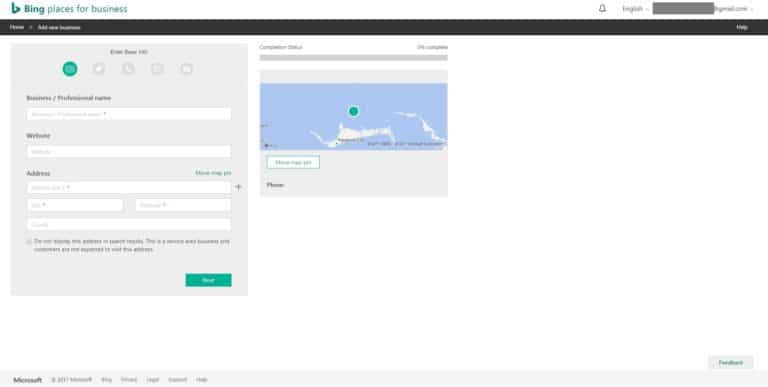
Step 5: Complete your business address and details
It’s important to make sure that your Business Name, Address and Phone Number are written in the same way across all of your online content. For example, If your business is located at 3 George Street, don’t use 3 George St on Google, use a consistent format for all of your contact details.
Once you enter your address details in Bing Places, it will try and locate you on the map. You can drag the pin to the exact location if Bing’s best guess is not quite right. Note the “Do not display this address…” checkbox at the bottom. This is important if you don’t want people showing up at the address you list (perhaps you’re a carpenter or professional driver that goes to your customers). If not – or if you sell from your location and deliver – leave this unchecked.
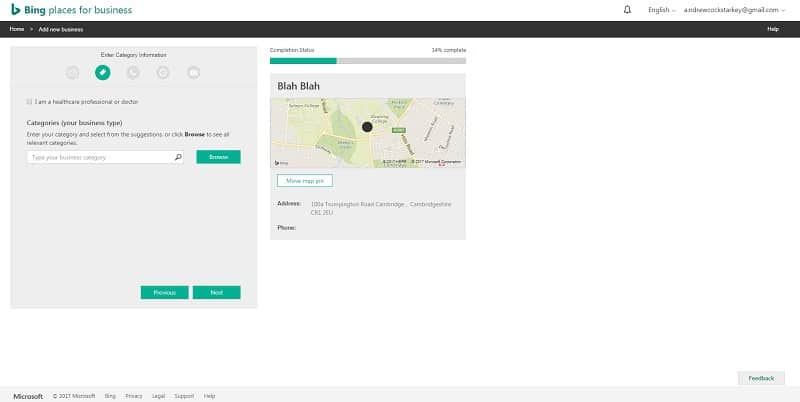
Step 6: Choose your business category
Next you need to pick your business category. The list is not quite as extensive as in Google My Business (with it’s categories and sub-categories). One nice feature in the Bing Places tool is that you can pick multiple categories and then, at the end, pick which one you want to show as your Primary Category. A note here: There is a special checkbox for healthcare professionals or doctors. If that’s you, you know what to do.
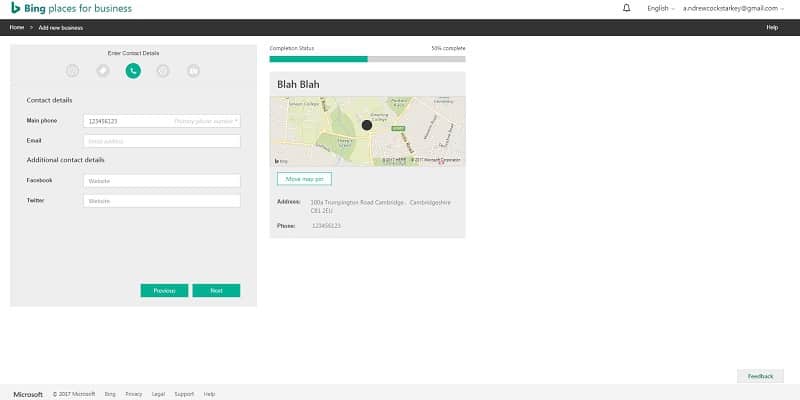
Step 7: Add your contact details
As with your physical address, keeping your ‘virtual’ details consistent is important. For example, if your website is http://raven5.com/ (without the www) – don’t add them in sometimes – it’s just inconsistent. As mentioned previously, search engines and SEO, inconsistency with business information is bad. For the social listings, what Bing Places is after here is the full URL of your social pages not your ‘handle’, so: https://twitter.com/raven5 not @Raven5.
It’s a nice touch from Bing here that, in the pane to the right hand side of the screen you, can see your business listing being built as you add in these details, giving you a preview of what customers will see.
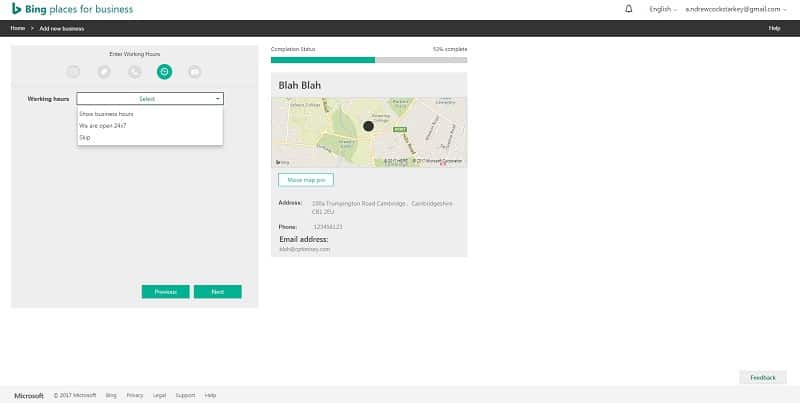
Step 8: Add your business hours
There are some quick selections here: “We are open 24×7” – but bear in mind that these details will show when someone searches for your business. If you’re listed as ‘Open’ at that time, if they call you they are going to expect an answer, so be careful. Do you really want your customers calling you at 10pm on a Sunday night?
You can tailor the hours for each day of the week – so if you’re open late on Wednesday’s that can be accommodated here.
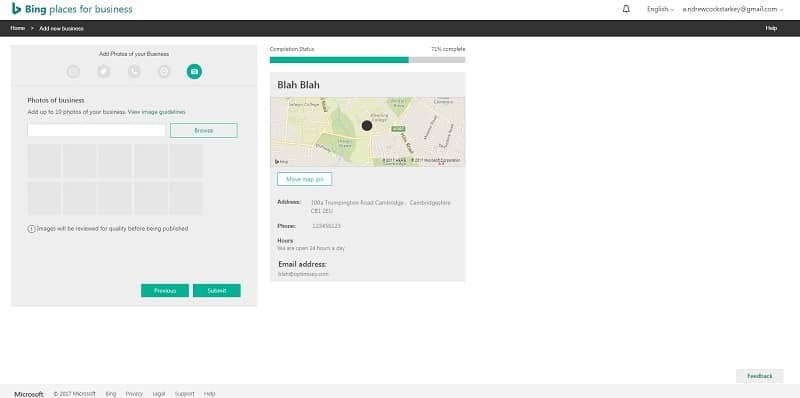
Step 9: Add photos
The last step is to add some images or photos of your business. This could be anything from your logo, a snap of your shopfront (so people recognize it if they’re planning a visit) or examples of your work. For example, if you’re a local gourmet donut shop, this is a great place to show off your delicious treats, or to show off your happy customers (who isn’t happy while eating a donut?!).
Why not add a photo of your team as well? ‘People buy from people’ as they say, so a lovely, smiley shot of you and your colleagues could make your next customer feel like they already know you before they get there. If you haven’t got any great shots of your business yet, you can skip this stage without adding any – but add it to your ‘to do’ list to get some. They can make a real difference to prospective buyers comparing you against your competitors.
Step 10: Verify your listing
The final step is to verify your business using one of the five possible options you might be given. Any business information changed or added is not eligible to be published to Bing until the verification process is completed. Not all businesses are eligible to verify using all five verification methods and the most common methods offered are phone verification and postcard verification only.
The first four ways you can verify your business require you to be able to receive a verification PIN code. Verification PIN codes can be sent by email to a public domain email address, by phone call to the business phone number, by text message to the business phone number, or by postcard sent to the business address. The fifth way is by web verification. Business owners are given five questions that must all be answered correctly and that only they would know.
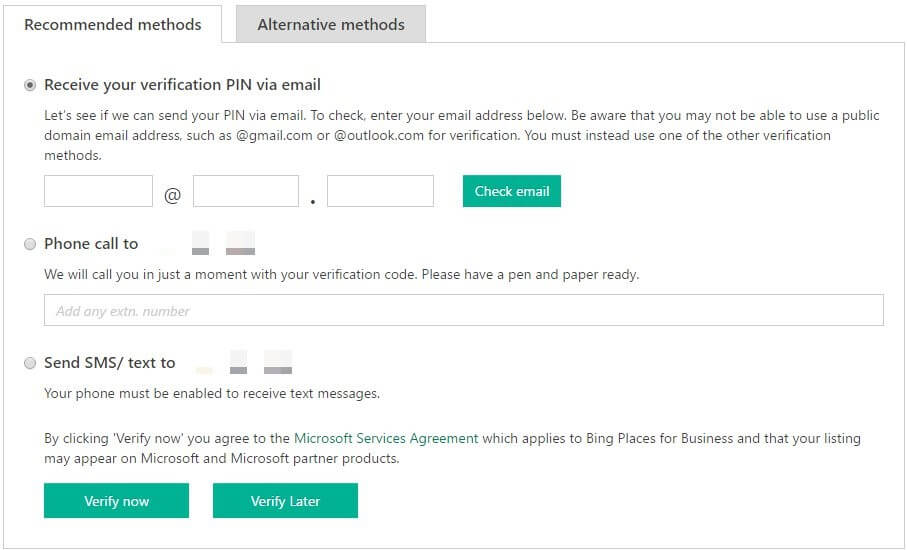
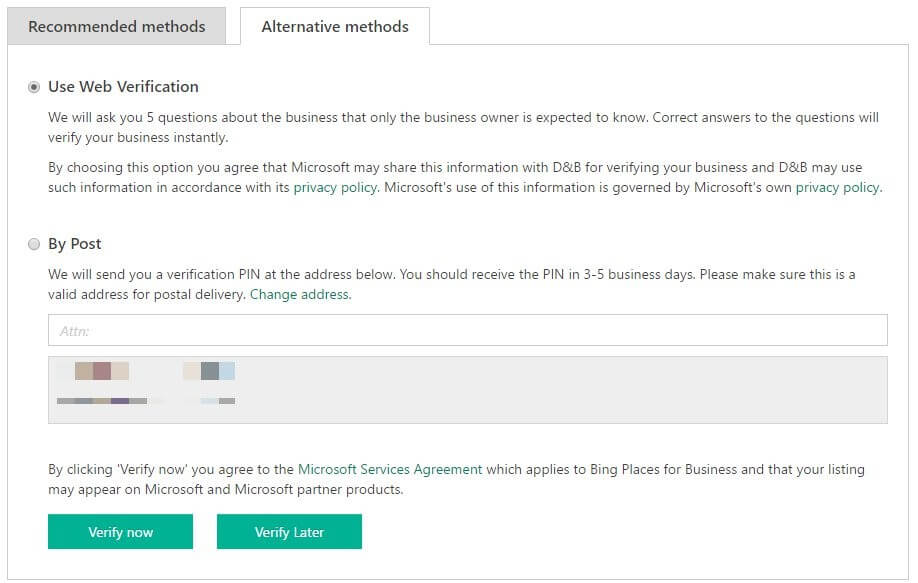
Of the verification options given to you, choose the method easiest to complete and hit verify now or verify later. If you (like many others) were only provided the post option, here is what you should be on the lookout for:
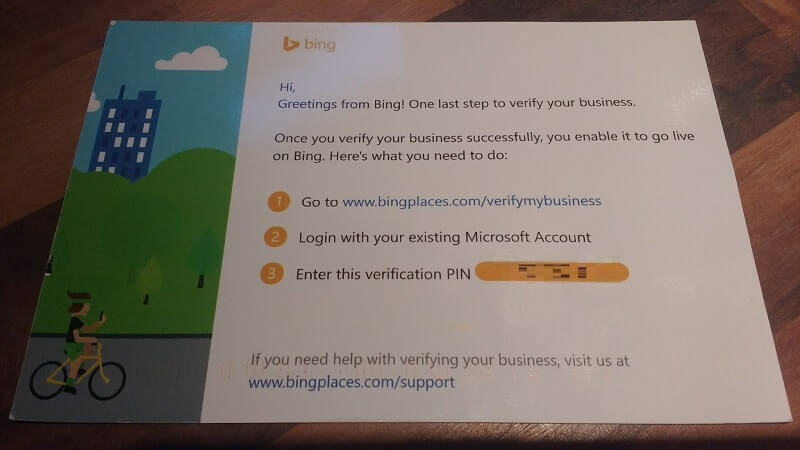
Follow the instructions on the postcard and that’s it! Now that your business has been added and verified in Bing Places for Business, your listing will be eligible to appear for relevant “near me” searches.
For more information, learn more about what Hyperlocal Marketing is and how Hyperlocal relates to Mobile. Plus, we’ve compiled detailed steps on getting listed on Google My Business and getting listed and claimed on Yelp.
For even more information, read through these blogs relating to Hyperlocal Marketing:
Get Noticed with Hyperlocal Marketing
Optimize Your Google My Business Listing
Why You Should be on Bing Places
Other Hyperlocal Listing Considerations